A Blog by the Editor of The Middle East Journal

Putting Middle Eastern Events in Cultural and Historical Context

Showing posts with label ANZACs. Show all posts

Tuesday, October 31, 2017

October 31, 1917: The Light Horse Charge at Beersheba

George Lambert, The Charge of the Australian Light Horse at Beersheba, 1917
When we last discussed the centenary of the Palestine campaign last June, the Egyptian Expeditionary Force (EEF) was stalled after te First and Second Battles of Gaza, with the Ottomans secure behind strong fortifications along a line running from Gazainland to Beersheba at the edge of the Negev. Archibald Murray had been relieved and a new general, Edmund Allenby, dispatched to take over the campaign.

Over the summer, Allenby moved his headquarters from Cairo to the front, received only limited reinforcement, but was ordered to advance with the forces he had.

The Ottomans had reinforced their defenses, but Minister of War Enver Pasha wanted to move to retake Baghdad from the British, and so assembled a joint Turkish-German force near Aleppo intended to move into Mesopotamia under German command, known as the Yıldırım Force. Enver's generals objected, both to being put under German command and to leaving the Palestine defenses undermanned in order to concentrate on retaking Baghdad when there were threats on other fronts.

The British operated best along the coast, where they could depend on the guns of the Royal Navy, but Murray having twice failed to break the line at Gaza, Allenby resolved to try something different. As I've noted in earlier posts, the British had slowly extended the railroad and a pipeline carrying fresh water across Sinai to the borders of Palestine. But to operate inland beyond the end of the pipeline required a source of water for the troops, and for the horses of the Desert Mounted Corps.

Allenby's first biographer, Archibald Wavell (who would himself command in Egypt in a later war), wrote that Allenby carried with him two books, the Bible and Sir George Adam Smith's Historical Geography of the Holy Land, a wonderful Victorian description of the historical landscape of Palestine. He would, then, understand the importance of finding water once he abandoned the coast road.

Gaza to Beersheba
The Ottoman lines were solidly fortified from the coast at Gaza to Hareira (modern Tel Haror in Israel), and beyond that lay the Ottoman garrison at Beersheba (Beer-Sheva) on the edge of the Negev. And, as Allenby would have known from George Adam Smith, that ancient town's Hebrew name means "Seven Wells." Allenby decided to take Beersheba by surprise with a fast-moving column and seize its wells; then, with water available, he would roll up the Turkish line along the 43 kilometers from Beersheba to Gaza.

Every effort was made to persuade the Turks that the main attack would be along the coast. Beginning october 27, field artillery and naval guns bombarded the Turkish lines at Gaza, and the main force of British and Empire forces, centered on XXI Corps, remained in front of Gaza. Meanwhile the British XX Corps and the largely Australian Desert Mounted Corps were moved quietly and by night far to the right. Allenby's center was weak and potentially vulnerable to Turkish attack, but Allenby gambled that the Turks would remain secure in their defenses.

Beersheba in 1917
Both Allenby himself and the new German overall commander of the Yıldırım Force, Erich von Falkenhayn, were veterans of the stalemated trench warfare on the Western Front (which at this moment was undergoing the bloodletting of Passchendaele), and Allenby had served with the cavalry in the Boer War, and so appreciated the importance of mobility on the battlefield. Though tanks had been used at Second Gaza, mobility at this time still meant horses, and at Beersheba that meant the Australian Light Horse and the New Zealand Mounted Rifle Brigade.

Sir Harry Chauvel
On October 31, the infantry force approached Beersheba from the West while the mounted troops concentrated against an Ottoman outpost at Tel el Saba east of Beersheba. Once Tel el Saba was taken, the Ottomans  began withdrawing from Beersheba, unknown to the British.

After a long day of fighting, Allenby urged Sir Harry Chauvel, commander of the Desert Mounted Corps, to take Beersheba by nightfall. This produced one of history's famous cavalry charges, by the 4th and 12th Light Horse. It was the 12th that actually occupied the center of Beersheba, but the 4th got most of the credit.

The Charge
Sometimes called the last great cavalry charge, there would actually be many more in this war and later ones; cavalry charges have occurred in Afghanistan in recent times. But Beersheba became an iconic moment for the Light Horse and thus a key moment or Australian national identity; the Prime Minister and other Australian dignitaries were in Israel today for the centennial observations.

Harry Chauvel had one knighthood already; he won another (Knight Commander of the Bath) for Beersheba. At a moment when the Western Front was being bled dry at Passchendaele, Allenby had struck the first blow in a campaign that would have him in Jerusalem before Christmas.


Thursday, March 23, 2017

The First Battle of Gaza, 1917: Part I: Opening Moves

The next few days will see the 100th anniversary of the First Battle of Gaza, the opening clash of the Palestine Campaign in World War This will be a multi-part post.

We saw in January how the Sinai campaign ended with the Battle of Rafah and the retreat of the Ottomans behind their own frontier.

The advance across Sinai had been slow, as the British had to extend their railway line and a freshwater pipeline as they advanced. Initially, the British Commander in Egypt, Sir Archibald Murray, intended to proceed slowly, but after a meeting between the British and French, it was decided to advance on multiple fronts; Maude's advance on Baghdad was one; Murray was ordered to move on Gaza, while other advances were launched on the Western and Macedonian Fronts. The February Revolution in Russia had undercut the Eastern Front. By March, the rail line had reached Khan Yunis, and the Turks were entrenched south of Gaza.

Murray (Seven Pillars)
By advancing along the coast to Gaza, the British avoided the main Ottoman concentration around Beersheba (where the Turkish railway ran) and allowed for naval resupply. The plan was to seek to capture the Gaza garrison by a single stroke, using the mounted to envelop the town and screen against Turkish reinforcements.

Dobell
Murray entrusted command of the operation to the Commander of his Eastern Force, Sir Charles Dobell, a Canadian. Dobell in turn entrusted the main effort to the highly mobile Desert Column, consisting of the ANZAC Mounted Division, the Imperial Mounted Division, the Imperial Camel Corps, and the 53rd Welsh Division.

The plan was to advance the rail line to the Wadi Ghazzeh, which cuts as a deep ravine a few miles south of Gaza. A network of ravines around the wadi made the land difficult to pass and the open, barren country south of the town gave a lack of cover and a clear field of fire to the Turkish defenders in their trenches. (See the map at bottom.)

Chetwode
The Desert Column was commanded by General Sir Philip Chetwode.

The defending forces were under the command of General Friedrich Kress von Kressenstein, the German Chief of Staff to Turkish Fourth Army Commander Djemal (Cemal) Pasha.

Kress von Kressenstein
As already noted, the main German concentrations were around Beersheba. In the advance on Gaza, Dobell estimated there were only 2,000 defenders in Gaza; the British had a total force of 22,000. In fact there were already 4,000 defenders, with reinforcements on the way.

In the open, arid country, both sides were able to use aircraft to good effect; the British made bombing raids on Beersheba and a rail junction through February and March, and both sides flew reconnaissance missions.
Bombing raid on Gaza..

The British appear, in retrospect, to have underestimated not just the Turkish numbers but also their morale. Unlike the advance across Sinai, Gaza was clearly Ottoman territory, and in both the First and Second Battles of Gaza, the British would fail, at least in part due to a precipitate retreat.

More to come.


Wednesday, January 11, 2017

The Battle of Rafah, January 9, 1917: Last Ottomans Pushed Out of Sinai, Part I

 Journal deadlines and other news have delayed this post, which really should have appeared two days ago. Last summer we traced the Ottoman Army's second advance toward the Suez Canal, and its ultimate repulse at the Battle of Romani in August of 1916.

Extending the railway across Sinai
During the remainder of the year, the British Empire Forces (mostly ANZACs). The advance was slowed by the need to build the railroad line and a pipeline for water forward as they moved. Finally, in two actions in eastern Sinai in December 1916 and January 1917, the last Ottoman troops were pushed out of Egyptian territory. With the Battle of Rafah a century ago Monday, British war historians mark the end of the Sinai Campaign.

The Main Allied force was rhe ANZAC Mounted Division, consisting of the 1st, 2nd, and 3rd Australian Light Horse Brigades and a New Zealand Mounted Rifle Division. From December 1916 these forces were assigned to the Desert Column, formed to support operations in Sinai and Palestine.

Turkish base at Hafr al-‘Auja
On December 20, 1916, the Allied force reached El ‘Arish, where they discovered the Ottoman force had evacuated the town and withdrawn up the Wadi El ‘Arish to the vicinity of Magdhaba to the southeast. (See map above. Illustrations are from Wikimedia.) Unwilling to advance beyond El rish while leaving Turkish and German forces behind their right in a fortified position at Magdhaba (not far from the big Turkish support base at Hafr al-‘Auja, just inside the Palestinian side of the border).

The Commander of the Desert Column, Sir Phillip Chetwode, arrived at El ‘Arish with supplies from Port Said, and prepared to dispatch the ANZACs under Sir Harry Chauvel. The German Commander of the Ottoman Desert Force, Kress von Kressenstein, had constructed a series of fortified redoubts at Magdhaba which he thought could resist attack, but he reckoned without the high mobility of the Light Horsemen.

The ANZACS, under Sir Harry Chauvel, advanced on the night of December 22-23,  and in a fierce battle on the 23rd succeeded after a day's hard fighting, forced an Ottoman surrender. The fight at Magdhaba had set the stage for the Battle at Rafah, the last act in Sinai.


Thursday, August 4, 2016

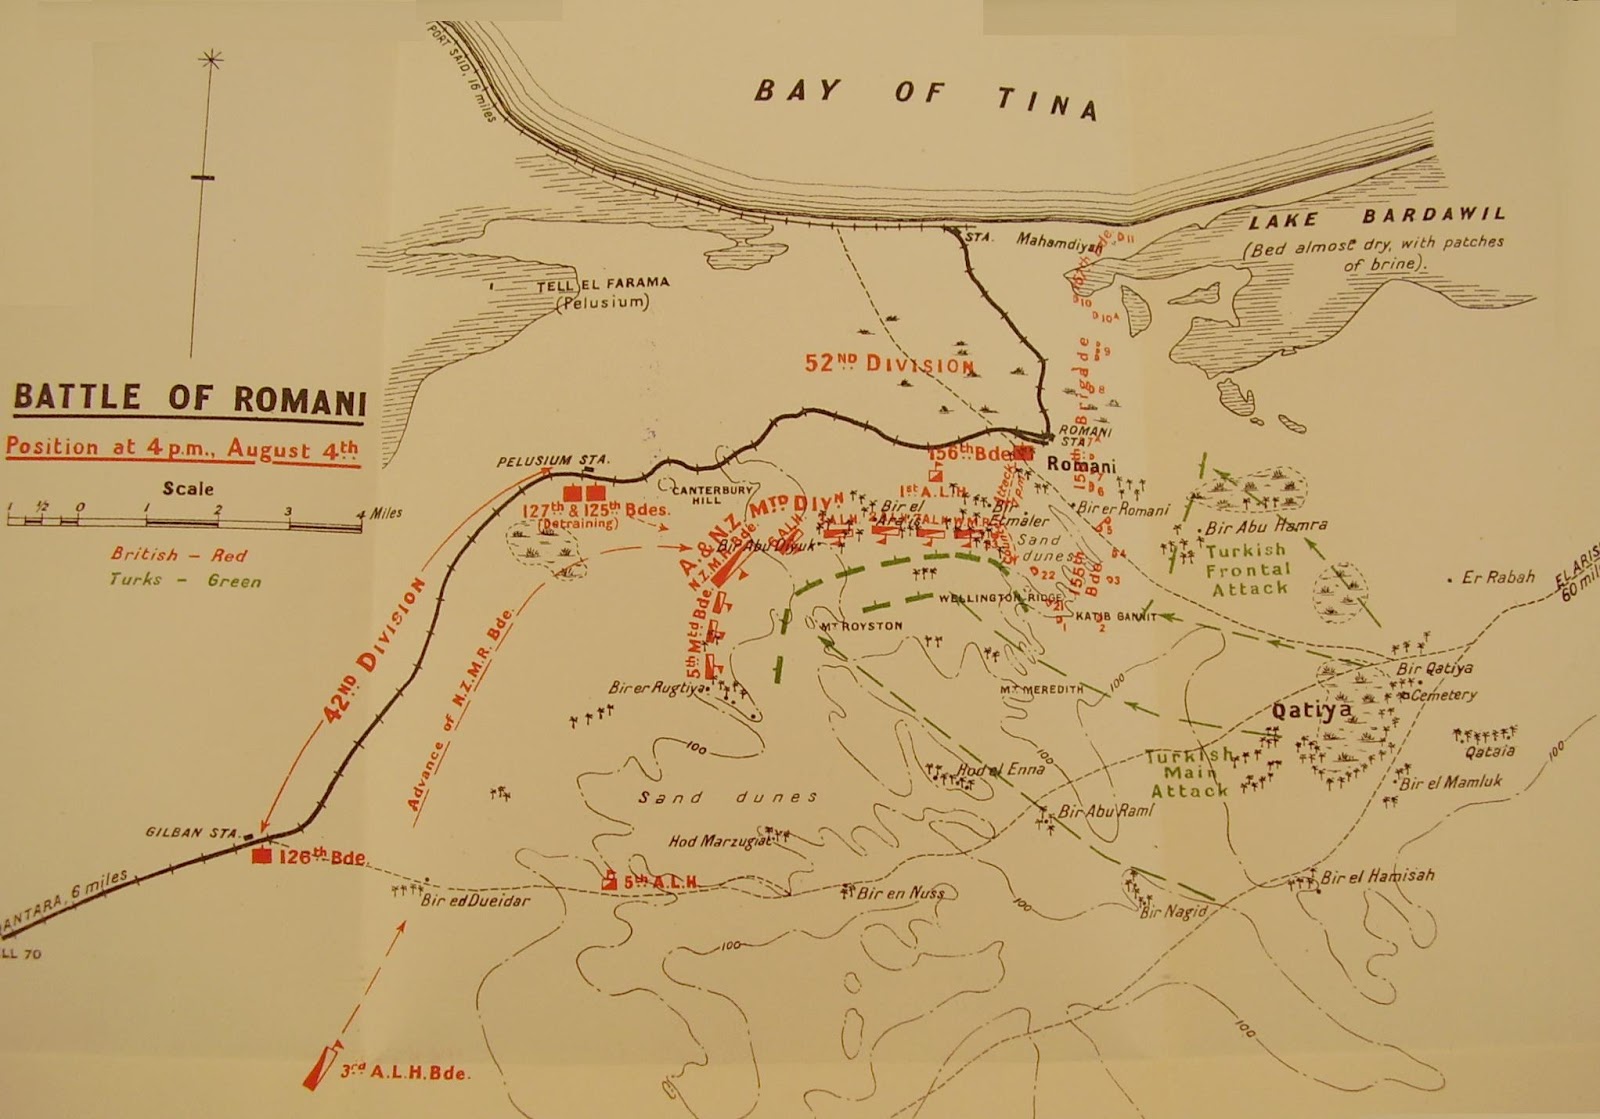
The Battle of Romani, August 4-5, 1916: Part II

In yesterday's Part I, we discussed the forces engaged and the initial deployments before the Battle of Romani in the Sinai a century ago. The advancing Ottoman and German force had been closely tracked by the British in their trek across Sinai, thanks to the new tool of aerial reconnaissance. the  The Turkish force had an extended logistical line, while the British fortifications were at the railhead of the line they were building across Sinai, and could be quickly rushed reinforcements from Qantara on the Canal. They had had the time to fortify the defensive position at Romani. While the Turco-German force slightly outnumbered the British Imperial forces (mostly ANZACs), they faced the challenges of being on the offense and far from potential reinforcements. Both the head of the German Military Mission, Liman von Sanders, and the local German commander on the scene, Kress von Kressenstein, complained about the decision to advance against the well-entrenched British forces.
As the British lines were anchored on the left by the sea, the Turkish attack was aimed at turning the right of the lines, in the desert. The hope was to drive in the flank and attack the rail line.

This was exactly what Harry Chauvel expected. Initially his main force consisted of the 1st Australian Light Horse Brigade; the 2nd Brigade was scattered in outposts and on patrol.

At around midnight on August 3/4. the Turkish advance force suddenly encountered the Light Horse on the right of the line. Fire was exchanged, and the Turks fell back to regroup. They began an organized attack around 1 AM. Through the night the Turks advanced, and the 1st Light Horse was forced to steadily fall back to a sand ridge they called Wellington Ridge. Various dunes and sandhills had been given names (Mount Meredith, Mount Royston) which appear in the battle narratives.

With first light around 4:00, it became clear that the 1st Light Horse was in a tenuous position, with its right being outflanked. At 4:30 Chauvel ordered two regiments of the 2nd Light Horse into the line to the right of the 1st, extending the flank. He also moved troops from the left of the line to extend his right, replacing them with troops of the 52nd (Lowland) Division, a British Territorial (or Yeomanry) unit intended got home defense. The Ottoman 32nd and 39th Regiments continued to try to outflank the Australian right, while the 31st Infantry pushed forward against the Territorials. As the morning wore on, the Light Horse were forced to fall back until they threatened to reach the ANZAC camps. But the horse artillery of the Light Horse stopped their advance. The Australians were reinforced by the New Zealand Mounted Rifles Brigade and the 5th Mounted Yeomanry, with the 42nd (Lancashire) Division of Territorial troops arriving by train.

As the day wore on and the Anglo-ANZAC line was reinforced, the Turkish and Germans, who had no reinforcements available or convenient railroad, and ho had marched all night and fought all day in August in the Sinai with little water, found their advance blocked and many began to surrender. By evening, the reinforced ANZACs and British counterattacked against enemy positions on the sandhill they had named Mount Royston.

As darkness fell, the battle had clearly shifted to the British side, By the next day, the reinforced British and ANZAC force would swell to some 50,000, vastly outnumbering their adversaries.

Tomorrow: Pursuit.

Wednesday, August 3, 2016

The Battle of Romani, August 4-5, 1916, Part I

On July 19 we discussed the Turkish advance into Sinai a century ago. This week marks the centenary of the Battle of Romani, a small but key turning point in the Middle Eastern campaign in World War I: Britain's first victory against the Ottomans after the retreat from Gallipoli and the surrender at Kut. It has also conventionally been seen as the transition between the Defense of the Suez Canal and the beginning of the Palestine Campaign.

Kress von Kressensten
The July post described the beginning of the Turkish advance, largely tracked by aircraft. The advancing column of Turkish and allied forces consisted of the Ottoman 3rd Infantry Division (31st, 32nd and 39th Regiments), veterans of Gallipoli, plus the German "Pasha" Force, including a German aircraft detachment, German light and heavy artillery and mortar, and one Austrian artillery unit. The German Forces were under the command of Freiherr Friederich Kress von Kressenstein, the German Chief of Staff to Jemal Pasha's Fourth Army. As they had advanced toward the British lines, they had established a series of defensive lines in case of falling back.

The British were under the overall command of Egyptian Expeditionary Force Commander General Sir Archibald Murray, at Cairo, and under him the commander of the northern (Number 3) Sector of Canal Defenses, General Herbert A. Lawrence, headquartered at Qantara.

But the man at the front, in the forward defense lines, was Maj. Gen. Harry Chauvel, an Australian commanding the ANZAC Mounted Division, consisting of the 1st and 2nd Brigades of Australian Light Horse with the British Territorial 52nd (Lowland) Division, and soon reinforced by the New Zealand Mounted Rifles Brigade and other units.

A Young Harry Chauvel
Any readers from Down Under will need no introduction to the Light Horsemen, or to Harry Chauvel. Already bloodied at Gallipoli, where they had fought without their mounts, the Light Horse would ride into fame in the Palestine Campaign, from Beersheba to the victory at Megiddo and the capture of Damascus.
Chauvel After the War
Harry Chauvel would go on to become the first Australian to command a Corps and was later Chief of General Staff.

Kress von Kressenstein might be the Prussian professional soldier,  with a name to match, but a horse soldier from New South Wales was going to be master of the coming battle.

The British front line was at Romani, to which the British had built a rail line, and which lay near the ruins of ancient Pelusium.

By the battle, British and ANZAC forces would number some 14,000, Ottoman/German/Austrian some 17,000.

The British were entrenched with their left on the Mediterranean and the Bardawil lagoon, the main force on a ridge they called Wellington Ridge, and built a line of fortifications along sand hills to a large dune called Katib Gannit.

The action would begin the night of August 3, and develop on August 4 and 5. We'll pick up the story tomorrow.

Light Horse Encampment at Romani


Thursday, December 31, 2015

The Senussi Campaign: Action at Wadi Majid and Gebel Medwa, Christmas Day, 1915


The holidays and a strained back have impeded blogging for a few days, but I wanted to continue my series on the Senussi Campaign in World War  (see Parts I, II, and III) with a discussion of actions which took place on December 25, Christmas Day, 1915. a century ago last week.

After the mid-December clashes at Wadi Senab and Umm al-Rakham, weather conditions made operations impossible between December 15 and Christmas Eve, so the Western Frontier Force remained in Mersa Matruh, where it was reinforced by a battalion of the New Zealand Rifle Brigade while the Senusi and their Turkish advisers concentrated at Gebel Medwa to the west.

A British spotter aircraft identified the Senussi concentration as consisting of 900 troops in three battalions, four mountain guns and two machine-guns, under Gebel Medwa, on the Khedivial Motor Road to the west.

The overall commander of the Western Frontier Force, Maj. Gen. Alexander Wallace, decided to dispatch an expedition to disperse the Senussi buildup. Once again, the force was divided between infantry moving on the Khedivial Motor Road, and the cavalry making a wide flanking movement through the desert. The infantry column was commanded by Lt. Col. J.L.R. Gordon and included the 15th Ludhiana Sikhs, a battalion of the 1st New Zealand Rifle Brigade, and the 2/8 Middlesex, a British Territorial unit.The cavalry column was commanded by the WFF's overall cavalry commander, Brig. Gen. J.D.T. Tyndale Briscoe, and consisted of elements of the 1/1 Buckinghamshire Yeomanry Regiment (Yeomanry were the cavalry equivalent of Territorials), Hertfordshire and Dorsetshire squadrons of the Composite Yeomanry Regiment, and Squadron A of the Australian Composite Light Horse Regiment. General Wallace and his headquarters were to follow the infantry as a reserve.

The map above shows the thinking: the infantry would push back the Senussi while the cavalry would come up in their rear and block their retreat.

Beginning the campaign under cover of darkness, Gordon moved the infantry out of Matruh at 5 am Christmas Day. As they proceeded towards their objective, the Senussi sighted them around dawn and the engagement began to develop. The 15th Sikhs were in the lead and Gordon noticed that the Senussi were not in position on Gebel Medwa, he sent one o the two Sikh companies to hold he hill and protect his right flank.  By 8 am the Senussi had brought up a mountain gun, which slowed the advance. A Nottinghamshire battery and the guns of HMS Clematis offshore and firing at a range of 10,000 yards. Once the hostile gun was silent,  Middlesex unit replaced the Sikhs on the Gebel, and ll the Sikhs plus the New Zealanders advanced against a ridge line, which thy had secured by 10 am. The infantry side of the action was largely a success, but the cavalry had still not appeared, having been delayed by difficulty moving its guns over rugged terrain, and had also been delayed by a skirmish with Senussi cavalry that occurred in the morning. The cavalry arrived around 3 pm and sought to drive the enemy towards the coast, but by 5 pm the late December light was failing and Gordon broke off pursuit. Both columns were ordered to return to Mersa Matruh.

But the bulk of the Senussi forces retreated to the west. On paper, it was a British victory. They dispersed the concentration of Senussi. he Empire forces lost 13 dead and 51 wounded; they estimated Senussi losses at between 300 and 400 dead and took 80 prisoners. But the bulk of the Senusi force escaped and lived to fight another day.

Monday, November 16, 2015

November 1915: Britain Decides to Evacuate Gallipoli

Lord Kitchener visits the trenches at Gallipoli, November 1915
Late last month in our continuing discussion of events a century ago, we noted the replacement of General Sir Ian Hamilton as overall commander of the Dardanelles expedition with General Sir Charles Monro, a Western Front general.

Following the failure of the Suvla  landings and the August offensive to alter the status quo on he Gallipoli Peninsula, and with Turkish defenses strengthened under new commander Mustafa Kemal, much of the British Government was eager to disengage from Gallipoli, feeling the troops would be better used in the West or the Salonika Front in the Balkans. At the end of October the Dardanelles Committee of the Cabinet was disbanded, and with it went the most pro-Gallipoli voice, Winston Churchill's. He had lost the Admiralty earlier in the year when the coalition government was formed, but had remained on the Dardanelles Committee. The War Committee that replaced it did not include him, and Churchill would quit the government to rejoin the Army.

The Gallipoli adventure still had an advocate: Lord Kitchener at the War Office. The hero of Khartoum and veteran of India and Egypt still favored an Eastern Strategy, but despite his popularity with the troops and the public, Kitchener had few fans in the Asquith Government, nd dispatched Monro to assess the situation in his new command, and also resolved to visit the battlefield himself.

Gen. Sir Charles Monro
In March of 1916, months after the last troops had been evacuated, Monro issued a sort of final report on his mission, and he remembered his instructions as follows:
To the Secretary of State for War, War Office, London, S.W.
Headquarters, 1st Army, France, 6th March, 1916.

MY LORD,- I have the honour to submit herewith a brief account of the operations in the Eastern Mediterranean from the 28th October, 1915, on which date I assumed command of the Mediterranean Expeditionary Force, until the 9th January, 1916, when in compliance with your directions, I handed over charge at Cairo to Lieut.-General Sir Archibald Murray, K.C.B., C.V.O., D.S.O.
On the 20th October in London, I received your Lordship's instructions to proceed as soon as possible to the near East and take over the command of the Mediterranean Expeditionary Force, My duty on arrival was in broad outline: -
(a) To report on the military situation on the Gallipoli Peninsula.
(b) To express an opinion whether on purely military grounds the Peninsula should be evacuated, or another attempt made to carry it.
(c) The number of troops that would be required, (1) to carry the Peninsula, (2) to keep the Straits open, and (3) to take Constantinople. Two days after my arrival at Imbros, where the headquarters of the M.E.F. was established, I proceeded to the Peninsula to investigate the military situation.
Monro arrived at Imbros on October 28 and reached Gallipoli on October 30. Monro was already dubious about the prospects and saw nothing to change his mind:
The impressions I gathered are summarised very shortly as follows: - The positions occupied by our troops presented a military situation unique in history. The mere fringe of the coast line had been secured. The beaches and piers upon which they depended for all requirements in personnel and material were exposed to registered and observed Artillery fire. Our entrenchments were dominated almost throughout by the Turks. The possible Artillery positions were insufficient and defective. The Force, in short, held a line possessing every possible military defect. The position was without depth, the communications were insecure and dependent on the weather. No means existed for the concealment and deployment of fresh troops destined for the offensive-whilst the Turks enjoyed full powers of observation, abundant Artillery positions, and they had been given the time to supplement the natural advantages which the position presented by all the devices at the disposal of the Field Engineer.
Another material factor came prominently before me. The troops on the Peninsula had suffered much from various causes.
(a) It was not in the first place possible to withdraw them from the shell-swept area as is done when necessary in France, for every corner on the Peninsula is exposed to hostile fire.
(b) They were much enervated from the diseases which are endemic in that part of Europe in the summer.
(c) In consequence of the losses which they had suffered in earlier battles, there was a very grave dearth of officers competent to take command of men.
(d) In order to maintain the numbers needed to hold the front, the Territorial Divisions had been augmented by the attachment of Yeomanry and Mounted Brigades. Makeshifts of this nature very obviously did not tend to create efficiency.
Other arguments, irrefutable in their conclusions, convinced me that a complete evacuation was the only wise course to pursue.
(a) It was obvious that the Turks could hold us in front with a small force and prosecute their designs on Baghdad or Egypt, or both.
(b) An advance from the positions we held could not be regarded as a reasonable military operation to expect.
(c) Even had we been able to make an advance in the Peninsula, our position would not have been ameliorated to any marked degree, and an advance on Constantinople was quite out of the question.
(d) Since we could not hope to achieve any purpose by remaining on the Peninsula, the appalling cost to the nation involved in consequence of embarking on an Overseas Expedition with no base available for the rapid transit of stores, supplies and personnel, made it urgent that we should divert the troops locked up on the Peninsula to a more useful theatre. Since therefore I could see no military advantage in our continued occupation of positions on the Peninsula, I telegraphed to your Lordship that in my opinion the evacuation of the Peninsula should be taken in hand.
Birdwood
The Asquith Cabinet was mostly eager for disengagement but decided to send Kitchener himself to investigate. Meanwhile Kitchener on November 4 dismissed Monro as Commander of the whole Mediterranean Expedition and named him to command the Salonika Expedition, with General William Birdwood, whom we've met before, taking over at Gallipoli.  Kitchener left England on November 5, but en route changed his mind about removing Monro before his visit, and canceled it, reaching Mudros November 10. As Monro recalled:
Subsequently I proceeded to Egypt to confer with Colonel Sir H. McMahon, the High Commissioner, and Lieut.-General Sir J. Maxwell, Commanding the Forces in Egypt, over the situation which might be created in Egypt and the Arab world by the evacuation of the Peninsula. Whilst in Egypt I was ordered by a telegram the War Office to take command of the troops at Salonika. The purport of this telegram was subsequently cancelled by your Lordship on your arrival at Mudros, and I was then ordered to assume Command of the Forces in the Mediterranean, east of Malta, and exclusive of Egypt.
Kitchener & Birdwood at Mudros, Nov.  10
Monro proceeded to Mudros, along with McMahon and Maxwell from Egypt,  and met with Kitchener aboard the troopship Aragon, which housed the Headquarters Staff of the campaign, at Mudros. Monro and the Army generals favored withdrawal, while Kitchener and the Navy favored operating through the winter.

Kitchener wanted to see the Front himself, and on November 12, 13, and 14 he visited the landing sites at Cape Helles,/Sudal-Bahr (Nov. 12), Anzac (Nov. 13), and Suvla (Nov. 14). He was well received by the troops.

The question of whether a winter campaign was possible was soon given new evidence from winter itself. On November 17 a gale mashed piers at Cape Helles and Anzac Cove.


The designation of Monro as Commander in the Mediterranean eat of Malta and excluding Egypt was clarified as follows, again quoting Monro:
Consequent on these instructions,
I received approval that the two Forces in the Mediterranean should be designated as follows: -
(a) The original Mediterranean Expeditionary Force, which comprised the Forces operating on the Gallipoli Peninsula and those employed at Mudros and Imbros as the "Dardanelles Army," under Lieut.-General Sir W. Birdwood, K.C.B., etc., with headquarters at Imbros.
(b) The troops destined for Salonika as the "Salonika Army," under Lieut.-General Sir B. Mahon, K.C.B., with headquarters at Salonika. The Staff of the original M.E.F. was left in part to form the Dardanelles Army, and the remainder were taken to make a General Headquarter Staff for the increased responsibilities now assumed. Other officers doing duty in this theatre with the necessary qualifications were selected, and, with no difficulty or demands on home resources, a thoroughly efficient and adequate Staff was created. Mudros was selected as being the most suitable site for the establishment of headquarters, as affording an opportunity, in addition to other advantages, of daily consultation with the Inspector General, Line of Communications. The working of the services of the Line of Communications presented difficulties of an unique character, mainly owing to (a) the absence of pier and wharfage accommodation at Mudros and the necessity of transferring all Ordnance and Engineer Stores from one ship to another; (b) the submarine danger; (c) the delay caused by rough weather. Close association with General Altham was therefore most imperative, and by this means many important changes were made which conduced to greater efficiency and more prompt response to the demands of fighting units.
In the meantime Winston Churchill, the unapologetic architect of the campaign,  resigned his remaining governmen position as Chancellor of the Duchy of Lancaster in order to join the Army on the Western Front. He made a last defense of Gallipoli on the floor of Parliament.

On November 22, Kitchener himself recommended withdrawal from Gallipoli.

Kitchener, after his visit to Gallipoli, visited the Salonika Front and Italy, and returned to England November 30.

If there were any lingering doubts, on November 27 a fierce Mediterranean storm hit Gallipoli from the southwest, driving small boats ashore, flooding the trenches, and crumbling fortifications. Then the wind shifted to the north and a fierce blizzard devastated the battlefield for days. Turkish and Allied troops were immobilized, hundreds died and thousands took ill. Snow at Anzac Cove:
On December 8, 1915, General Monro ordered Admiral Birdwood and the Navy to withdraw the troops from Gallipoli.

There were some 93,000 men, 200 guns, thousands of horses and mules and other equipment to withdraw from under the guns and in sight of Turkish forces only a few hundred yards away in every case.

The one great Allied success at Gallipoli would be the successful withdrawal, over several weeks, without a disaster on the beaches. But that's a story for another day.


Thursday, October 29, 2015

October 28, 1915: Sir Charles Monro Relaces Ian Hamilton at Gallipoli

Though this post is technically a day late, or a day early perhaps (see below), it is an attempt to bring our centennial series on the Middle East in the Great War up to speed by returning to the Gallipoli Front where, from mid-October to mid-November, as decisions would be made which would lead to the decision to wind down and evacuate the Dardanelles force.

Gen, Sir Ian Hamilton
On October 16, months after the Gallipoli operation stalled following the Suvla landings in August, General Sir Ian Hamilton, the overall commander, was recalled by Lord Kitchener. Hamilton, despite being one of the more disastrous British generals in a war when Britain produced more than is share of disastrous generals, retired to write books of military memoirs and became head of the veteran's organization, the British Legion, for Scotland. He remained a pillar of the British establishment though, as a leader of the Anglo-German Association, he was an early admirer of Adolf Hitler. Having already been knighted in 1910, he was made a Knight Grand Cross of St. Michael and Saint George (GCMG) in 1919. To be fair, they say he wasn't bad in the Boer War. He lived until 1947 and died at 94.

Gen. Sir Charles Monro
Replacing Hamilton as the Commander-in Chief of the Mediterranean Expeditionary Force was General Sir Charles Monro, a veteran of the Boer War and the Western Front. He was also an advocate of the Western Front first approach, though he would end up commanding in the Salonika Front, Mesopotamia, and India before the war was over. As we'll see in the coming weeks, he would also be the advocate of withdrawal from Gallipoli. He arrived at Imbros, the staging area, on October 28, and at Gallipoli October 30, so posting today splits the difference.

He would find support from another direction: the growing demands of the Balkan Front. As I noted in discussing the Mesopotamian Campaign, Bulgaria had finally entered the war on the Central powers side, and promptly attacked Serbia, which was already partly occupied by Austria-Hungary, thus giving the Ottomans the prospect of a direct rail link with Vienna and Germany. Though a bit peripheral to the Middle East proper, the British and French sought to shore up a collapsing Serbia by landing a military force at Salonika (Greek Thessaloniki) in Greece. They did this despite opposition from a divided Greek government. In the end it was too late to save Serbia, so the rationale became defending Greece (whether it liked it or not) against the Ottomans and Bulgarians.

The French would send mostly colonial troops and the Russians and other allies would send token forces, and remnants of the Serbian Army who escaped through Montenegro and were evacuated by Italy would join them, but the obvious source of British Empire troops were the ANZAC, British, and Irish troops stuck at Gallipoli. Already on September 30 the 10th (Irish) Division left Gallipoli, landing at Salonika October 5. The troops on Gallipoli were clearly not going to take Constantinople, so Salonika, despite the crushing of Serbia, and were thus a potential source of troops.

Thursday, August 6, 2015

"Their Lonely Graves are by Suvla's Waves": Doubling Down to Make it Worse: Suvla Bay, August 6-7, 1915

The Plan
On April 25, 1915, you will recall, the British and French allies landed troops (mostly Australians and New Zealanders) at ANZAC Cove and Sud al-Bar on the Gallipoli peninsula. More than three months later they were still trapped on narrow beaches under fire from Ottoman artillery and hemmed in by Turkish infantry entrenched on rocky ridgelines. A maneuver intended to sidestep the stalemate in the trenches of the Western Front had instead replicated it, but with most of the carnage limited to the Allied side. A military situation such as this suggests to a sane strategist two options: 1) find a way to outflank the enemy, or 2) cut your losses and withdraw from an unwinnable situation.

What did Britain do?

What part of "Gallipoli 1915" did you not understand? Let's land more troops in the same impossible positions! It worked so well on the Western Front. But the August landings added a few new twists: giving command to a general who had never commanded in battle, and landing in darkness. What could possibly go wrong?

The landings were intended to assist a breakout by the ANZACs from ANZAC Cove by having the ANZACs attack from their position against the Sari Bair mountainous ridge as additional troops landed at Suvla Bay just to their north. Another attack was to be launched from Cape Helles. The map above shows the intended plan. The new troops being landed at Suvla Bay were the IX Corps consisting of two brigades  (the 30th and 31st) of the 10th (Irish) Division and all of the 11th (Northern) Division (32nd, 33rd and 34th Brigades). These were "New Army" units formed at the outbreak of the war,  The 11th was to go ashore the night of August 6 and the 10th to follow the morning of the 7th. But little went according to plan.

Stopford
The theater commander, Sir Ian Hamilton, had asked for an experienced general from the Western Front, but those considered were junior in seniority to the 10th Division  commander and could not be considered. Instead Lord Kitchener chose Lieutenant General Sir Frederick Stopford,who had fought at Tel el-Kebir back in 1882, and risen through the ranks in mostly staff and adjutant and headquarters positions. The younger son of an Earl, Stopford, despite high rank, had never commanded a large force in battle. He had retired in 1909, but returned to active duty for the war.

In a war marked by disastrous British generalship, Stopford was unusually bad.

The Ottomans knew new landings were coming, but didn't know where. They reinforced the Asian shore and other parts of the peninsula, but as the British prepared to land 20,000 troops at Suvla, only some 1,500 Turkish troops faced them. Stopford still managed to fail.

Late on August 6, the ANZAC forces launched assaults against positions at Lone Pine and Chunuk Bair in a new attempt to break out and also provide a diversion for the troops landing at Suvla Bay. (Though the Suvla troops were English and Irish, "Suvla" would become a notorious term among the ANZACs, who considered that they were sacrificed to cover the British landings.) (The final scene of the 1981 Mel Gibson film Gallipoli portrays the ANZAC August offensive, and does so in a rather anti-British way.)

Two brigades of the 11th were to go ashore south of Nibrunesi point while the 34th Brigade was to land in Suvla Bay proper, with the Irish brigades to follow. Landings were to begin at 10 pm after Australian breakout was under way.

It began with a success, if a Pyrrhic one. Two companies of 6th Battalion, the Yorkshire Regiment, drove the Ottomans off the small hill known as Lala Baba, but with the loss of a third of the men and most of the officers killed or wounded.

The 34th Brigade landing in Suvla Bay was a disaster: many had to wade ashore in neck-deep water while under Turkish fire. Stopford had decided to remain aboard HMS Jonquil, and soon went to sleep.

The Reality: Situation August 7
The landings had begun in darkness. When the moon came up, Turkish snipers began to fire. The beaches were a confused jumble of men, many landed in the wrong place, or left without orders. The Irish brigades came ashore and added to the chaos. Drinking water was in short supply. IX Corps is said to have taken 1,700 casualties in the first few hours, more than the total number of Ottoman forces opposing them. The German commander of the Ottoman troops on Gallipoli ordered two divisions to reinforce the Suvla front on the 7th. Stopford had still not come ashore. Nevertheless, he signaled Hamilton that he was going to "consolidate his position."

Sir Ian Hamilton dispatched aides to the front and then came himself. Overnight on August 8-9 he ordered an assault on the ridgeline; the Turkish reinforcements had now arrived and made mincemeat of the 32nd Brigade.

Mustafa Kemal, Gallipoli, 1915
As the British chain of command remained in chaos, Liman von Sanders replaced the local Turkish commander in the Suvla-Chunuk Bair sector with the commander of the 19th Division. This was Mustafa Kemal, the future Atatürk.

If  Liman von Sanders now had the right man in command, the British did not. It was not until the 14th that Hamilton communicated to Lord Kitchener the need to replace the Suvla commanders.  On the 15th Stopford was recalled and replaced with Sir Julian Byng. The 11th Division Commander was also replaced, and the 10th Division Commander resigned his command rather than serve under Stopford's temporary replacement. Meanwhile, the Australians and New Zealanders were heavily engaged in the Chunuk Bair region, receiving no relief.

The disaster at Suvla would find many echoes in later memory. Though the only Australians at Suvla proper were a bridging engineer unit, Eric Bogle's antiwar And the Band Played Waltzing Matilda refers to Suvla Bay, perhaps in the sense that Chunuk Bair was part of the campaign. The 1981 movie Gallipoli would contain a reference to the English drinking tea on the beach at Suvla while the Australians are thrown into battle.

The Irish also, like the ANZACs, would in years to come show ambivalence about whether their worst enemy at Gallipoli was the Turks or the British. Suvla is also invoked twice in the Irish rebel song The Foggy Dew, by Canon Charles O'Neill, about the 1916 Easter Rising in Dublin, referring to the Irish Division at Suvla and Cape Helles (Sud El-Bar):
Right proudly high over Dublin town
They hung out a flag of war.
'Twas better to die 'neath an Irish sky
Than at Suvla or Sud el Bar.
And from the plains of Royal Meath
Strong men came hurrying through;
While Brittania's sons with their long-range guns
Sailed in from the foggy dew.

'Twas England bade our wild geese go
That small nations might be free.
Their lonely graves are by Suvla's waves
And the fringe of the grey North Sea.
But had they died by Pearse's side
Or fought with Valera true,
Their graves we'd keep where the Fenians sleep
'Neath the hills of the foggy dew.
Here's a version by Sinead O'Connor and The Dubliners, illustrated with scenes taken from the 1996 Liam Neeson film Michael Collins:

Tuesday, May 5, 2015

May 5, 1915: The ANZACs First Meet "Beachy Bill"

Soldiers like to name things on their battlefields. Not with the mapmaker's dry names like "Hill 904," either. The American Civil War was fought in a country full of cornfields, peach orchards, roads and ponds, but by its end "The cornfield" was at Antietam, as was the Sunken Road (also called Bloody Lane as Fredericksburg already had a sunken road), "The peach orchard" was at Gettysburg, as was Devil's Den, Little Round Top, etc., and Shiloh had the Bloody Pond.

The ANZACs who found themselves ashore at Gallipoli on April 25 soon realized that they were unable to get beyond the landing beaches due to strong Turkish positions on the ridgeline above, and they were subjected to constant shelling from artillery beyond the protective ridge.

Some ANZAC names (Wikipedia)
Stuck as sitting targets below, they named the hills and natural features around them. There were Gun Ridge, Battleship Hill, Baby 700, the Sphinx (remember they'd trained by the Sphinx) the Nek (an Afrikaans word, probably named by a Boer War veteran), and so on. One of the landing beaches was named Brighton Beach, presumably ironically.

One such named location was "the Olive Grove," in a plain near Gaba Tepe, where a well-concealed Turkish artillery position was set up in a place from which it had a clear view of the ANZAC beaches. It could shell the beachhead at will and regularly did so, also dropping shells and shrapnel offshore where the ANZAC troops regularly swam to escape the heat of the Aegean summer.

The Olive Grove position first came into action 100 years ago today. It would be a persistent threat to the beachhead right up to withdrawal months later, which  took place under its gunnery. The Australian and New Zealand troops not only named the Olive Grove, they named the gun.

They called it "Beachy Bill." 

According to the Australian National University website, "Glossary of Slang and Peculiar Terms in Use in the A.I.F": 

Beachy Bill The Turkish guns emplaced in the Olive Grove (Gallipoli) which caused considerable casualties at Anzac, mostly on the beaches.
World War I. 1915 (Partridge). Attested in F&G and Partridge.
While Partridge does not note this as specifically Australian, ‘Beachy Bill’ clearly has special relevance to the Australian experience of the war.
There’s a certain darned nuisance called ‘Beachy,’
   Whose shells are exceedingly screechy;
               But we’re keeping the score,
               And we’re after your gore –
So look out, ‘Beachy Bill,’ when we meet ye.
1916 ANZAC Book, p. 96.
They never got to meet him up close, but certainly felt his presence. (They speak generally of a single gun, though other guns in the vicinity contributed.) "Beachy" presumably refers to its threat to, and nearness to, the beaches.

From a Turkish website about Gallipoli, quoting a British source:
According to the unknown author of a 1917 publication, The Story of the Anzacs, ‘ On an average, “Beachy “ is said to have accounted for twelve men a day.’ Whether ‘ accounted for’ meant killed or killed and wounded is not clear; but an average of twelve men a day over eight months, added to nearly 3,000 casualties, which was not a bad score even if it included wounded. B Depot made its contribution, most of the casualties being amongst the infantry fatigue parties who were men ‘resting’ from the front line.
"These Things Happened", (Melbourne 1975), F.F. Knight, p. 147
According to a letter to the Editor of the Western Mail (Perth), Thursday 28 December 1933, page 2, as cited by the Australian Light Horse Studies Centre, they tried quite hard to silence the position, including naval shelling. (The writer refers to the "Olive Grove" as the "Orange Grove," perhaps due to a trick of memory:)
Unless Australian soldiers' vocabulary has changed dramatically in 100 years, which I rather doubt, I would assume that "was seldom referred to in complimentary terms" probably means the name was usually preceded by some rather pungent adjectives particularly popular down under. Particularly the one beginning in "f" and ending in "ucking." (I believe someone once called it "the great Australian adjective," though it's hardly unfamiliar to Brits and Amricans.)

The Australian War Museum has a sketch, "View Southward from Anzac Position to Olive Groves" that shows the position with the Kilid Bahr ridge rising behind. The artillery concealed in the grove could shell the beach:
Perhaps easier to read with the contrast sharpened:

The 7th Light Horse Regiment revisited the battlefield in 1918 after serving in Gallipoli and Palestine, and the Australian Light Horse Studies Centre offers an excerpt from their official history about the Olive Grove and Beachy Bill:
Lieutenant Colonel John Dalzell Richardson produced a unit history published in 1919 called The History of the 7th Light Horse Regiment AIF which included a section specifically related to the battle of Beersheba and is extracted below.
Richardson, JD, The History of the 7th Light Horse Regiment AIF, Sydney, 1919, pp. 107 - 113:
CHAPTER VII.

THE OLD BATTLE-FIELDS . . .
The hill system of Anzac, which culminates in the height of Chunuk Bair to the north, slopes gradually downwards in undulating ridges almost to sea level at Cape Helles-the height of Achi Baba being the one outstanding feature, not far from the village of Krithia. But between the village of Maidos on the Straits and the headland of Gaba Tepe lies a level plain of no great width, and on the side farthest from Anzac is the famous "Olive Grove," from which Beachy Bill used to fire with such deadly results. The enemy position, known as Pine Ridge, on the right flank, looks down on this plain, and the gully held by the Turks at the eastern end of Lone Pine opens into it. If this gully and the ridge beyond, as well as Pine Ridge, could have been taken, the valley would have been open for an advance at any time as far as the Kilid Bahr Plateau without any natural obstacle.
Finally, a modern photo of the former site of a gun emplacement at the Olive Grove:

Saturday, April 25, 2015

ANZAC Day at 100: Gallipoli Begins

ANZAC Cove, April 1915
 A century ago today, Allied Forces landed at two location on the western coast of Turkey's Gallipoli Peninsula Australian and New Zealand troops in the north and British (actually initially Irish) battalions in the south. These two initial sites came to be known to the troops, in the first case, as ANZAC Cove (they had landed a mile north of their target), and the southern site at Cape Helles as Sedd el-Bahr. In August a third landing would be made to the north of ANZAC Cove, at Suvla Bay. The three names will endure in the annals of carnage and military folly.

From the first moments ashore it all went wrong. Landing in the wrong place, units disorganized and misplaced, and the landings confined to a narrow strip west of a ridgeline controlled by Turkish artillery.

The disaster at Gallipoli would grind on for months, haunt Winston Churchill's career for decades, and end in ignominious evacuation. Turkey marks it as a great national victory though usually marked on March 18, the date of the initial naval victory), but in addition to playing a formative role in the Turkish Republic, it also marks a turning point in the national emergence of two other great modern  nations, Australia and New Zealand. From their role as sacrificial lambs at Gallipoli emerged a growing self-confidence, that would lead in 1922, nearby at Chanak, to the refusal of the Dominions to automatically send troops when Britain requested, the beginning of real independence for the Dominions.
I reflected on those ironies in my post three years ago, "For ANZAC Day: Gallipoli, Chanak, and the Three Great  Nations Born From That Crucible."

And that offers me an opportunity to revisit other posts I have done through the years on Gallipoli. Just this March, I told the tale of the naval failure on March 18 (after which the failure of the land attack after Turkey had a month to build up forces should have been predictable): "Belated Centenary: March 8, 1915: Nusret Lays Her Mines," and "March 18, 1915: The British and French Navies Fail at the Dardanelles."

If, after March 18, the Naval defeat had doomed the landings, were there alternative strategies? Though Churchill and the Admiralty were wedded to Gallipoli, Lord Kitchener and the War Office preferred the idea of a landing at Alexandretta in Syria, and T,E. Lawrence became a champion of the idea. Earlier this year, I compared the plans and asked, "A Historical "What If?": Could the Alexandretta Landing in 1915 Have Worked While Gallipoli Failed?" That post contains links to several others on the Alexandretta scheme, and you can judge for yourself.

On the ground front, we met the ANZAC Commander in my post on "The Birth of ANZAC: 'Birdy' Birdwood is Ordered to Egypt, December 1914."

In the mythologies of competing nationalisms, Turkish nationalists often forget that the Ottoman armies came from all over the Empire. And Arab nationalists often portray the Arab provinces as solidly behind the Arab Revolt. But the future "Father Turk: himself, Mustafa Kemal, rose to fame commanding the 19th Division at Gallipoli, we forget that two of its three regiments were in fact raised in Syria: "Lost in the Dueling Nationalist Mythologies: The Forgotten Syrians at Gallipoli." They were Arabs and Kurds and Turkmen, and tend to be overlooked.

And for Armistice Day/Remembrance Day two years ago, I published photos of the Atatürk Memorials at the ANZAC Parade in Canberra (the only monument to an enemy commander) and the similar monument at Wellington, both of which bear the same quote as the Atatürk monument at Gallipoli:
Those heroes that shed their blood and lost their lives... you are now lying in the soil of a friendly country. Therefore rest in peace. There is no difference between the Johnnies and the Mehmets to us where they lie side by side here in this country of ours... You the mothers who sent their sons from far away countries wipe away your tears. Your sons are now lying in our bosom and are in peace. After having lost their lives on this land they have become our sons as well.
It's a fitting tribute to the men on both sides who fought for a barren peninsula a century ago because they were, as someone (attributed to numerous people) once said of British soldiers, "they fight like lions, but they are lions led by donkeys."  (You will notice in all this I have not discussed the overall British commander, General Sir Ian Hamilton. This is to avoid having to use four-letter profanity on a solemn day remembering those who died by his blunders.)

Now, the multimedia:

Here is a silent early Turkish film clip of troops during the Gallipoli campaign:


An ANZAC fim restored by New Zealand Director Peter Jackson of Lord of the Rings fame:

And finally,a song I've used before, the Scots/Australian folk singer Eric Bogle's antiwar lament, "And the Band Played Waltzing Matilda," Bogle himself sings the audio; the first half of the pictures,  are of ANZACs a Gallipoli; the second half honors Canadian forces in more recent wars (I presume the clip was made by a Canadian):

Thursday, April 2, 2015

Today is the 100th Anniversary of the "Battle of the Wasa‘a," When ANZACs Trashed Cairo's Red Light District

Today marks the 100th anniversary  of the event known, to those who've ever heard of it, as the Battle of the Wasa‘a or Wazza, or, Down Under, the Wozzer. Not an official battle of World War I, it's nevertheless a memorable story I first told back in 2011. Today's version is updated, corrected, enhanced with new photos and maps, and some broken links have been fixed.

Though it took place in Cairo, few Egyptians know about it; unless you're an Aussie or a Kiwi you probably don't know it, and even then only if grandpa was unusually candid. Hence, one of my wanderings down the forgotten (and somewhat censored) side alleys of Middle Eastern history. And side alleys are definitely involved.

Brace yourselves. This one requires a lot of historical background.

If you are, or have ever been friends with or worked with, an Australian or a New Zealander (I've worked with both), you will know ANZAC Day, April 25, the shared national day/remembrance day of the two great nations Down Under, memorializing the day the ANZACs (the Australia and New Zealand Army Corps in World War I) were thrown ashore under Turkish guns at ANZAC Cove on Gallipoli on April 25, 1915. April 25 is, in both countries, the analog not only of Armistice Day/Remembrance Day but also a bit of the Fourth of July, for it was out of the crucible of World War I that both the Aussies and the Kiwis found their modern national identities. Though it marked a signal defeat, that was not the fault of the soldiers but of their utterly incompetent commanders, who were from neither of the countries involved. I will not at the moment comment on the degree to which the incompetence of the bloody Pommy Bastards British High Command led to unspoken disdain for the motherland and their growing independence of their colonial patrons. Except to say that the occasional ANZAC Day parties to which I was invited rarely mentioned the Turks at all, but rather Mother England. (Though the Turkish Republic itself has its genesis in the same events.)

April 25 will never be overshadowed, at least not soon, in the national mythology of either nation. But many of the veterans of the ANZAC Corps,  remembered another "battle" in that same month: on April 2, 1915, a mere 23 days before the debacle of Gallipoli, the ANZACs fought another battle in the Middle East, this one in Egypt. No Turks were involved. It was remembered by those who ever spoke of it as the "Battle of the Wasa‘a" to be scholarly about it, or in the speech of our Australian cousins, the "Battle of the Wazza." Or, even more colloquially, "the Wozzer."

Like all Great War veterans all the ANZACs are gone now. The last Australian Gallipoli vet, a Tasmanian named Alec Campbell, died in 2002. Though a Gallipoli vet, he didn't land there till November 1915. The last Aussie and the last Kiwi to land on April 25 died in 1997, and Australian Jack Ross, who enlisted in 1918 but never left Australia but still served in the Great War, died in 2009 at age 110. Good on them all. And their opponents too who died for their country. Brave men, stupid war.

Neither as glorious nor as bloody as Gallipoli, the "Battle" of the Wozzer may, however, have been almost as stupid, and even more pointless in its objective, and it certainly was something only a few veterans spoke of very much. For on the eve of their great sacrifice at Gallipoli, the Australian and New Zealand troops violently trashed the Red Light district of Cairo. On Good Friday. And their own troops, along with British military police, were called out to stop their destruction of the neighborhood.

The ANZAC units, Australians and New Zealanders, a great many of whom had never been far from their own hometowns before, found themselves in Cairo. Because Britain's own troops were tied down on the Western Front, and the Indian Army in "Mespot," (Mesopotamia, Iraq), the "colonial" troops were sent to the Middle East, where they would play major roles in both the Gallipoli and Palestine campaigns. Australian films like Gallipoli and The Lighthorsemen have helped make them known in the Northern Hemisphere.
The ANZACs were trained in camps near the Pyramids (photo) and other areas, the Australians mainly at Mena near the Great Pyramid and the New Zealanders at Zeitoun northeast of Cairo. So, not unnaturally, they spent their free time in Cairo which could be reached by tramway. Below right is a photo of a tram overflowing with Australians, including on the roof.
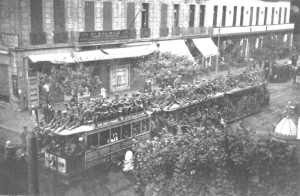
It would be nice to say they spent their time sightseeing, but they spent their time the way many soldiers have in many wars, drinking and seeking women, especially of the sort whose virtue was negotiable.

Lest you approach this tale with a "boys will be boys" snigger, let me deliver the downside up front: though tolerated houses of prostitution were supposedly subject to medical checks, the rate of venereal disease during the war was enough to create major problems for the British and colonial forces. ANZAC units reported an average incidence of VD across the Corps as 12%, or one man in eight; one unit is said to have had a rate of 25%. And penicillin hadn't yet been discovered.

Camp at Pyramids, Kangaroo Mascot
Cairo in 1915 was rather different from the Cairo of today. Many of its residents, whether foreign born or Egyptians of foreign ancestry, claimed the protection of foreign consulates under the system of "capitulations," under which they were subject to the laws of their protective country, not of Egypt. Disputes with Egyptian nationals were settled in a system known as the "Mixed Courts." This naturally created complex jurisdictional issues for law enforcement.

Sir Thomas Russell (Russell Pasha), was the British Deputy Chief of Police for Cairo, later becoming the Chief. (Egypt, until the war nominally Ottoman but under de facto British rule, was declared a British Protectorate when Turkey joined the Central Powers.) Russell's memoir, Egyptian Service, 1902-1946 is a very readable view of the British era from the inside. (His wife, Lady Dorothea Russell, wrote a readable guide to the Islamic monuments, a predecessor of later works by Richard Parker and Caroline Williams). As a police officer, his memoir deals a lot with the seedier side of things, including prostitution and the hashish trade.

Egypt had developed a licensed brothel quarter in the late 19th century, where the houses were nominally subject to medical inspection. Beyond the licensed quarters, there were areas where prostitution was semi-tolerated. Even when, in 1916 (the year after the events described here), a crackdown was introduced, the capitulations got in the way. Russell Pasha:
One particular house of some size and popularity defied Bimbashi Quartier, our chief detective officer, and myself for months by ringing changes on the nationality of the padrona [the Madam]. Police could not enter a foreigner's house without the consent and presence of the Consul or his representative. When we arrived with the French consular cavass to demand admission from the French padrona, the spy-hole in the front door would be opened and a husky voice announce that Madame Yvonne had sold the business to Madame Gentili, an Italian subject, without whose Consular representative we could not enter. Next week we would arrive with the Italian cavass to be met by another change of nationality by the padrona. Picqued beyond the ordinary, Quartier one night assembled seven Consular cavasses at the fast-closed door, and one by one the fictitious landladies were defeated, entry gained, and the law enforced.
A linguistic note: "Bimbashi" is not detective Quartier's first name. It's a rank which in the Egyptian Army and Police was equivalent to lieutenant colonel. (Though binbashi today in the Turkish Army is a major.)

Now, to further set the scene for the Battle of the Wozzer, we need to introduce the Red Light District of the Day (or the Red Blind Quarter as it was known). The area may come as a surprise to those who know Cairo today, since it included the once-elegant colonnaded street of Clot Bey (named, ironically given those VD rates above, for the French doctor who introduced European medicine to Egypt in the age of Muhammad ‘Ali), and other streets to the north of the Ezbekiyya Gardens.

Back in Ottoman times, Ezbekiyya had been a lake, and the area to its west was mostly flood plain; Bulaq was an island. Under the Khedives Isma‘il and Tawfiq in the late 19th century the area to the west was filled in and became the Ismailia Quarter, what today we think of as downtown Cairo. (Midan al-Tahrir was originally Midan Ismailiyya.) The Ezbekiyya Lake became the Ezbekiyya Gardens, formal gardens with promenades, surrounded by the foreign consular quarters and the big foreign hotels, including the famous original Shepheards, burned in 1952, opposite its northwest corner. (The later Shepheards was placed on the Nile instead.)

The area to the north of Ezbekiyya was known as Wagh al-Birka, "fronting the lake," because it was once the site of palaces and villas on the lake. The name itself actually needs a little note as well. Literally, the original name was named وجه البركة (Wajh al-Birkat in Arabic) which normally would be pronounced, in Cairene dialect where the jim is pronounced as a hard 'g', as Wagh al-Birkat. But in this case, the jim acquired an sh sound, so that the usual pronunciation was Wish al-Birkat. In fact, the engineer and planner of much of modern Cairo, ‘Ali Pasha Mubarak, in his street-by-street masterwork on Cairo, Al-Khitat al-Tawfiqiyya al-Jadida, actually spelled it that way: وش البركة.

Ezbekiyya remained fashionable, with Shepheards being the HQ of the ANZAC command (who may or may not have known that in 1798 Napoleon had his headquarters just to the west)

The general area of the Wajh al-Birkat and the streets to its north, though once fashionable, were also in the area where the new city of Cairo and the elegant foreign hotels rubbed up against the older quarters of town. It led to unusual juxtapositions: one reason the military command could respond so quickly to the riot we're about to describe is that they were in Shepheards only a couple of blocks away; just north of the area under discussion sat the main Coptic Cathedral for Cairo (the church is still there, but it was replaced as seat of the Coptic Pope by the new Cathedral in ‘Abbasiyya in the Nasser era). It was also an area where the tolerated brothel quarters around Clot Bey and the Wajh al-Birkat merged into a more unregulated area known as the Wasa‘a, literally the "wide area" which apparently once referred to the old fish markets when the Nile came much farther east. The actual "battle" in question started in a street called the Darb al-Muballat, but most of the troops knew the whole area as the Wasa‘a. Or, since the ‘ayn would defeat them, as the Wazza or the Wozzer. As Russell Pasha put it, the Wajh al-Birkat
. . . was populated at the time with European women of all breeds and races other than British, who were not allowed by their Consular authority to practice this licensed trade in Egypt. Most of the women were of the third-class category for whom Marseilles had no further use, and who eventually would be passed on to the Bombay and Far East markets, but they were still European and not yet fallen so low as to live in the one-room shacks of the Wasa'a which had always been the quarter for purely native prostitution of the lowest class.
He tells us the area was "ruled" by a "king," "a huge, fat Nubian named Ibrahim al-Gharbi," who dressed in women's clothes and wore a white veil.

Now, we come to April 2, 1915. The ANZACs were getting ready to ship off to the Greek islands of Lemnos and Mudros to prepare for the Gallipoli landings. According to some of the accounts I will be quoting below, there had been some incidents leading up to the "battle," but since April 2 was Good Friday, there was no training that day and large numbers of men had leave for the Easter weekend. So all the resentments came to a head.

Depending on the version, and there are many, the immediate provocation was one or more of the following:
  • Anger over the extremely high rates of VD, already mentioned;
  • An Englishman was trying to rescue his sister from one of the houses;
  • Claims the beer was watered or even stretched with urine;
  • A New Zealand unit was outraged because one of its Maori soldiers was rejected by a girl as too dark-skinned;
  • Arguments over price.
Perhaps it was some combination of all these, or just the imminent deployment.The fight began with an attack on a house at Number 8, Darb al-Muballat, for whatever reason. Soon sofas were burning in the street, a piano came crashing out a window, and as many as 2000 ANZACs were torching brothels and fighting with natives and each other. Both mounted British military police and Australian units eventually put the riot down; the whole thing started between four and five in the afternoon (remember, the men had the day off and doubtless started drinking early) and ended by eight. What may be the nearest thing to a photo of the scene: From the Australian War Memorial collection. Caption: "Cairo, burnt buildings and carts possibly the aftermath of the riot later known as the Battle of the "Wozzer", which took place in the street known as the Haret El Wasser near Shepheard's Hotel, Cairo 2 April Good Friday 1915."

The lady (well, woman anyway) in the foreground in what might be a nightgown invites speculation. I'm pretty certain she's not a man in a galabiyya.

Now, some accounts, including eyewitness ones, from those who were there. Oddly enough, more of those on guard duty who put down the riot seem to have written about it than the participants.

Another view of the post-riot damage is at right.

An account from a website dedicated to the Australian Light Horse:
First Wassa (also Wozzer or Wazzir), the appellation given to the first of two unheroic riots in the Haret el Wassa (the brothel quarter of Cairo, Egypt) involving troops from Australia and New Zealand. The initial incident occurred on 2 April 1915 (Good Friday), after units of the Australian & New Zealand Army Corps (ANZAC) received news that their period of training was at an end and that orders had been received for them to embark for long-awaited action. Causes of this disturbance reportedly lay in a desire to exact revenge for past grievances arising from dealings with the district's denizens-such as diluted liquor, exorbitant prices, and high rates of venereal infection-although wild rumours of stabbings of Anzac men by locals also appear to have played a part.

Trouble began soon after 5 p.m. when soldiers began evicting whores and their pimps into the street, and tossing their possessions out after them. Bedding, furniture and clothing-even pianos-were thrown from windows of buildings several storeys high. These materials were piled in the road and set alight. The town picket, drawn from the Australian 9th Light Horse Regiment, came on the scene and tried to clear the men out of the houses being attacked. Five arrests were made, although the crowd-growing larger by the minute refused to let these men be taken away, snatched rifles from some of the troopers and threw the weapons onto the fires, and succeed in freeing four of the prisoners.

British military police (MPs) were summoned, about 30 arriving on horseback to choruses of abuse and a shower of stones and bottles. An ill-advised effort by the MPs to gain control by firing their pistols, supposedly over the rioters' heads, resulted in the wounding of four men in the throng estimated at 2,000-3,000. This only served to further inflame matters, and forced the police to hastily withdraw. Efforts by the Egyptian fire brigade to douse the bonfires were also frustrated, its hose-lines being cut, its members manhandled (especially after they turned a hose onto the crowd), and the engine itself finally pushed into the flames.

Left to themselves, the more unruly elements began to loot some shops and put the torch to a Greek tavern. Shortly after 7 p.m. a second fire engine arrived, this time under cavalry escort which exercised extreme tact, and the various fires were tackled while a still sizeable crowd looked on. Since the `Wassa' was close by Shepheard's Hotel, where the Anzac commander had his headquarters, armed troops had also been called out. After the  Lancashire Territorials (non-regular British troops who were popular with the colonials) were drawn across the road, the rioters wisely began to disperse and order was eventually restored by 10 p.m.

A formal inquiry was convened the following day under Colonel Frederic Hughes, commander of the AIF's 3rd Light Horse Brigade, to investigate the causes of the riot and establish responsibility for its outbreak. Many New Zealand officers attempted to disclaim that their men had played any part, although the evidence of their presence was quite conclusive - the officer leading the Australian picket was adamant that `New Zealanders predominated'. In any event, nine-tenths of those present had been merely spectators. Apportioning blame was next to impossible, however, with few of the 50 witnesses able (or willing) to provide precise information. As the number of men injured by the MPs' bullets (three Australians and one New Zealander) was roughly in proportion to the size of the respective contingents, it could be said that the ‘honours' were about equally shared. So too was the damages bill of £1,700.
The Lancashire troops were the 42nd East Lancashire Territorials.

From a letter by Jack Jensen, from Wasley in South Australia, written in England recovering from wounds in Gallipoli:
The last few days we had in Egypt I shall never forget as three nights running there were riots in & about Cairo. On good friday there was a big row in one of the main streets in Cairo. I think I told you once before that Cairo is a very immoral place in fact they say that it is the worst town in the world. Some streets there are nothing but brothels & houses of infamy where every possible vice under the sun exists. Of course some of our men had been going to these places & had got diseases of different kinds & as a (what?) our chaps had a grievance against these places. Finally to finish up with one of the Manchester soldiers who were also stationed in Egypt found his sister in one of them. She had left England as a servant to some lady who had taken her to Egypt & left her there. I dare say you have heard of that sort of thing it is called the white slave traffic here in England. Anyway this girl went from bad to worse until finally she way found dancing in what they call a Can-Can hall that is a dozen or so women dancing perfectly naked in a big hall & exposing their person to every kind of indignity both by themselves & also the onlookers. It is just as well that I cannot tell you everything that goes on here as it would only grieve you. This Manchester chap managed to have a talk with his sister & tried to get her away. She was only too willing to go but the people she was with would not let her & they threw the brother out of a window as a result he was in hospital for nearly a week. When he got right he came in the camp & told our chaps & asked them to help him. At first they could not find the girl again but at last she was found in a particularly vile house. This was a day or two before Good Friday & that day being a holiday about 500 of our chaps & some New Zealanders & English troops went in to raid these houses. When they got in there a good many got drunk & they were joined by a great many more also drunk so the affair ended in a riot. They got the girl out first & then set fire to the houses. The affair started about four oclock in the afternoon & was kept up until nearly midnight Shops were raided & windows broken everywhere. I was on guard that day & we were called out to go & stop it but only twenty of us could do nothing against nearly two thousand. They had a fire in the street & were throwing the furniture out of windows two & three storeys high on to it. Some of us went in & tried to put it out & a chair came out of a window three storeys high & hit one chap & nearly killed him. We carried him away & a few minutes after piano came out of the same window & fell with an awful crash on the pavement. All the strings seemed to break at once & it went off like a cannon. After that the Military Police charged the crowd on horseback firing their revolvers into them but the crowd threw broken bottles & stones at them. One policeman got badly hit & one eye cut out with a broken bottle & two of our chaps were hit by the revolver shots.

About eight oclock five hundred Manchester troops came with fixed bayonets & were told to charge. They charged alright but they wouldn’t go for our men so they gave them rifles & our chaps threw them on the fire. Then they turned & ran & our fellows followed them up with sticks A while after the South Australian Light Horse came but the horses wouldn’t face the fire & smoke A little after eleven oclock the Westminster Dragoons came. They looked all right as they were coming down the street with all their swords drawn & their horses going straight through the fire & smoke. This very soon cleared the street & then we went for the houses & took everybody prisoner that we found. We got about fifty Australians & some New Zealanders.

The girl who was the cause of all the trouble was sent to England. She was taken charge of by the Y.M.C.A. The men in camp collected over forty pounds to pay her passage & expenses back to England Of course the money was handed over to the Y.M.C.A.

Next night a riot started in the canteen of the Abbasieh camp. Somebody caught an Arab who was employed at the canteen making water in a tub of beer. The Arab was at once pulled & half killed. All the beer casks & tubs were broken & spilt & all the groceries & goods stolen & the place burned down.

The guard was called out again but by the time we got there everything was over & the camp was quiet except for the fire still burning.

On Sunday evening the New Zealanders burned down a picture show. The man had advertised a boxing match & doubled the admission & then showed just the same pictures as he usually did. So they burned his place down.
The "Manchester" troops Jensen refers to are presumably the Lancashire Territorials mentioned in the earlier quote as being more popular with the ANZACs than British regulars; before the British government started messing with the historical counties, Manchester was in Lancashire.

You can also find the original contemporary diary of Australian War historian C.E.W. Bean on the Australian War Memorial site; Diary Number 3, including the Wozzer (which at one point he calls the Wozzy), is here.This has gone on too long and transcribing a PDF manuscript would take me all night, but it's there if you want more detail. His account of April 2 begins on page 25 of the PDF link.

At right, troops in evidence in the Wasa‘a after the riot, via Australian Light Horse Studies Centre.

Now, for the sake of completeness, I should note that there was a second Battle of the Wozzer fought on July 31. This was a much smaller affair, and took place after most of the ANZACs were ashore at Gallipoli.It also has its own website, The 2nd Battle of the Wozzer, complete with some of the testimony, so I'll just refer you there. The medallions at the top of this post are from his site.

Source here
Now, a discursus on the area in more recent times, in case any of my readers want to visit the scene.

When I first went to Cairo back in the 1970s, Ezbrekiyya still had traces of its former glory, though once the Opera house burned down it was less of a draw. Nearby Cafes and bookstalls surrounded the gardens.

When the new Azhar Flyover was built, I think sometime in the 80s, the south side of Ezbekiyya was dominated by its on-ramps and nearby Midan al-Ataba dwarfed by the highway. But the area to the north, site of our story, has changed less (though of course Shepheards has been gone since 1952, two revolutions ago). I've scanned in a section of a Survey of Egypt map from the late 1960s. It's in Arabic, but so for non-Arabists who nevertheless know Cairo, here's a brief guide:

The large street with a tramway down the middle at the right is Clot Bey. The street running westward and intersecting Clot Bey at the lower right corner, today the extension of Naguib al-Rihani Street east of Gumhuriyya St. was the old Wajh al-Birkat street. Gumhurriya (then Sh. Kamel) and Clot Bey reach the northwest and northeast corners of Ezbekiyya a couple of blocks south of the lower edge of the map. The big building complex in the right center of the map is the Coptic church of Saint Mark, formerly Cairo's main cathedral, now replaced by the big one in ‘Abbasiyya. The north-south street through the middle of the picture, running from Naguib al-Rihani to Clot Bey, is Al-Kanisa al-Marqusiyya, named for the church which is on it. If you'll look between Naguib al-Rihani (Wajh al-Birkat then) and Qabila street to its north, you'll see a small back street, the third to the right counting from Al-Kanisa al-Marqusiyya. The print here is too small to read, but it is Darb al-Muballat. The original brothel attacked and burned in 1915 was at number 8, Darb al-Muballat. I don't know if the street numbers have changed; today's number 8 is on the west side of the street. It's a pretty staid neighborhood today, or was the last time I saw it. Illegal brothels were cleaned up in 1916 and prostitution made illegal in 1924. (Therefore there was no prostitution in Egypt during World War II when Cairo again filled up with foreign troops. After all, it was illegal.)

The overall area from Google Earth  (copyright Google):
And Darb al-Muballat today (again, street numbers may have been changed so Number 8 may not be in the same spot, and the copyright is Google's):